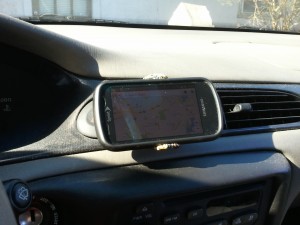
I’m currently involved in a large-ish DIM project that was taking up my driveway, is currently taking up my deck, and will, when finished, occupy space in the backyard. I plan to write that one up when it’s complete (I hope to finish it this week), but I figured that GeekFluent’s first DIM Project posting ought to be something simpler, and something you could do today with things you might already have handy.
This project was inspired by an article I read on LifeHacker on one of the many, many uses for binder clips — a dashboard mount for a smartphone. Turns out it was even easier to make than reading the instructions implied (and the instructions made it seem pretty easy). I made this a few months ago and it’s been an incredible convenience ever since.
Since making this, I don’t ever fumble for the phone while I’m driving. If the phone rings, I only need a quick glance to see who’s calling, and with my Bluetooth headset, it only takes me one touch to answer. If I need directions, I can use my phone’s Navigation software without blocking any of my view through the windshield.
GeekFluent does not endorse the use of this project for texting or tweeting while driving. (Even though one imagines this would make such endeavors very easy (especially if one owned and Android and was handy with Swype (for instance))). Stay Safe and obey your local laws.
What You’ll Need
- One large binder clip
- A pair of pliers
- Something to wrap the “clip handles” to add traction — the original article wrapped them with embroidery thread for a very professional look (I used duct tape which was way faster and easier and has worked just fine)
- One rubber band — may be optional depending on your phone
Making the Mount
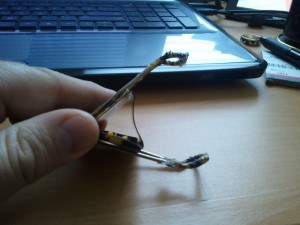
Using the pliers, bend each of the clip’s handles slightly “inwards”. I found that having the bend right at the narrow or “squished in” point worked great. This bend will be what actually holds the phone in place.
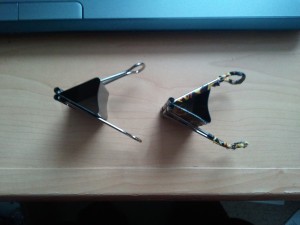
The clip on the left is unmodified. The one on the right is my finished product. As you can see, the mount doesn't require a large bend.
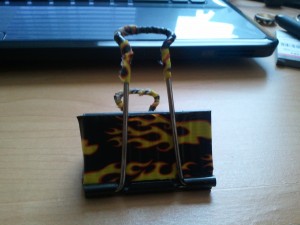
Once you have the arms bent, you’ll want to do something to them to help them have more traction or “grip” so your phone won’t bounce out on the first pothole you hit. I used thin strips of duct tape to wrap the arms, and since I had this awesome flame duct tape, also decorated the sides of the clip with it.
Installing the Mount
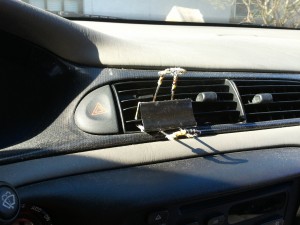
The built-in genius of this particular project is that you require no additional materials to install the mount on your dashboard — it’s made out of a clip! Simply clip it to one of the slats on a dashboard air vent.
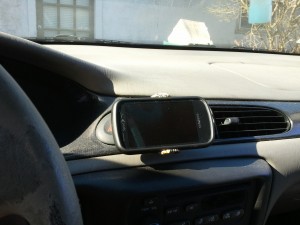
Now, simply turn your smartphone to landscape orientation and put it between the arms of the clip. Experiment here. Depending on your phone, a rubber band looped around the arms a couple times may be necessary to keep it gripped firmly in place. My phone (with the modified hard case and extended battery) is heft enough that I found that the rubber band not only wasn’t needed, it made it difficult getting the phone in and out of the mount. Adjust as appropriate for your own phone.
The End Result
Overall, I’ve been really, really happy with this. A whole bunch of convenience for minimal effort, and you just can’t beat the cost of materials for this project. Just another way to make the smartphone even more ubiquitous.

